MetaMask is a leading crypto wallet, and relies on browser integration and good design to serve as one of the main gateways to the world of Web3, decentralized finance (DeFi) and NFTs.
Here's how it works, and how to get started with it.
What Is MetaMask?
MetaMask is a browser extension and mobile app that serves as an Ethereum wallet, and is installed like any other browser extension. Once it's installed, it allows users to store Ether and other ERC-20 tokens, enabling them to transact with any Ethereum address and EVM compatible networks.
By connecting MetaMask to Ethereum-based dApps, users can use their coins in games, stake tokens, and trade them on decentralized exchanges (DEXs). It also provides users with an entry point into the emerging world of decentralized finance, or DeFi, providing a way to access DeFi dApps.
How To Get Started Using MetaMask
Though it might seem complicated to beginners, MetaMask is one of the simpler Ethereum wallets and dApp browsers to use, and can be set up in a couple of minutes in most cases. Below we will focus on how to set up MetaMask’s browser extension.
To use MetaMask Extension, you will need either Chrome, Firefox, Brave, Opera, Edge, or Safari.
First, you’ll need to download and install the official MetaMask extension (also known as a plugin or add-on) for your chosen browser. For most people, this is the Google Chrome extension.
Once installed, you should see the below splash screen. Click the ‘Get Started’ button to begin creating your Ethereum wallet using MetaMask.
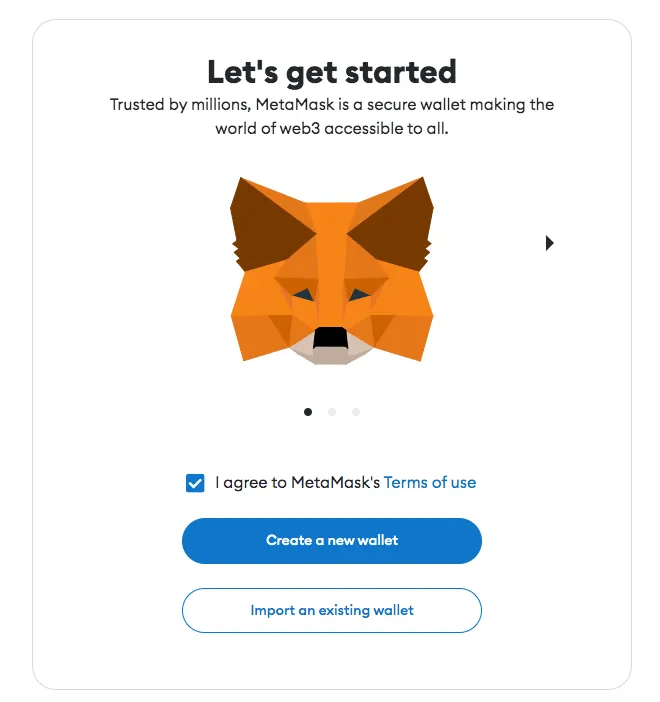
On the next step, click the ‘Create a Wallet’ button.
You’ll then be asked if you want to help improve MetaMask. Click ‘No Thanks’ if this doesn’t interest you, otherwise click ‘I agree’.
Pick a password on the next step. This needs to be at least 8 characters long and will be associated with the device you’re on. It will be used frequently to log back on to the MetaMask extension. We recommend using a completely unique password that hasn’t been used anywhere else, and one that contains a mixture of upper and lower case letters, symbols, and numbers.
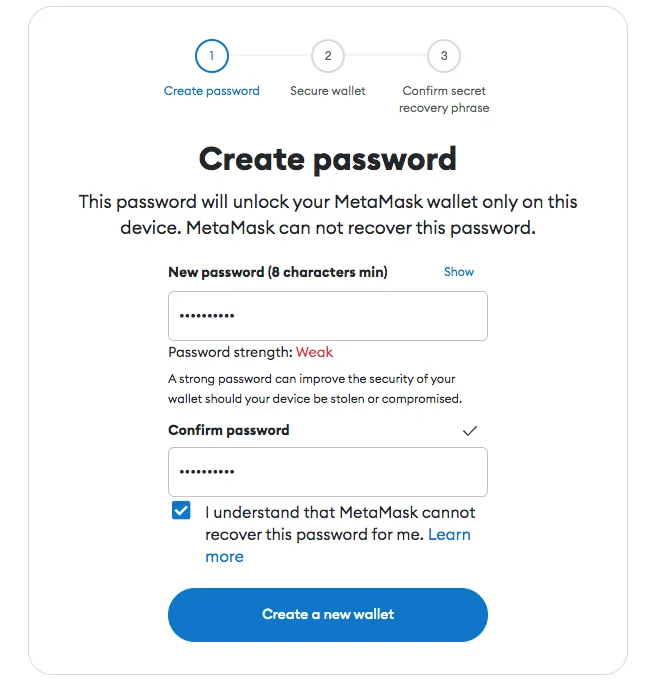
Read and accept the Terms of Use, and click ‘Create a new wallet’ once your password has been set.
MetaMask will then present you with your 12-word backup phrase. You’ll need to write this phrase down carefully, with the words recorded in the same order displayed on your screen. This phrase will be needed to recover your wallet should you ever lose access to your computer, and should be kept stored somewhere safe. Anybody who has access to your 12-word backup phrase will have access to the funds in your MetaMask wallet, so keep it private.
Click ‘Next’ once you’ve written this down.
Confirm your backup phrase on the next screen by entering the words in the same order saved previously. Click ‘Confirm’ once done.
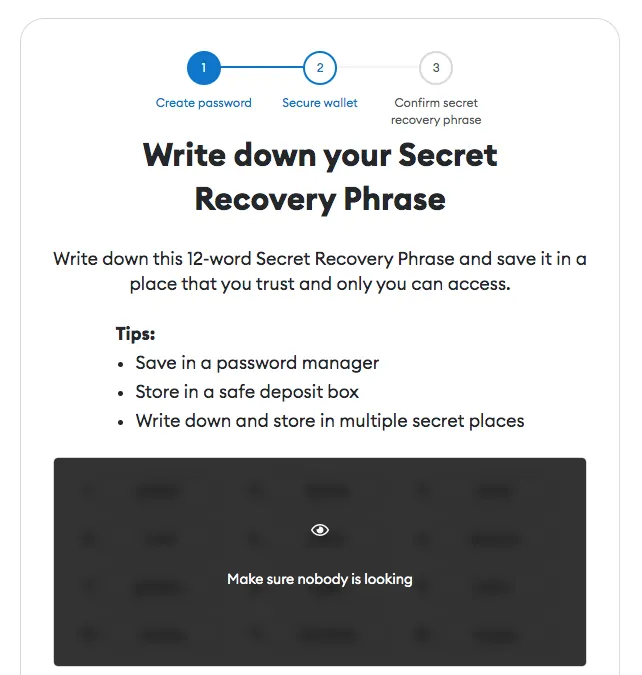
You have now almost completed the MetaMask setup process. Just click ‘All Done’ on the final page, and you will be automatically logged in to MetaMask.
If you ever get logged out, you’ll be able to log back in again by clicking the MetaMask icon, which will have been added to your web browser (usually found next to the URL bar).
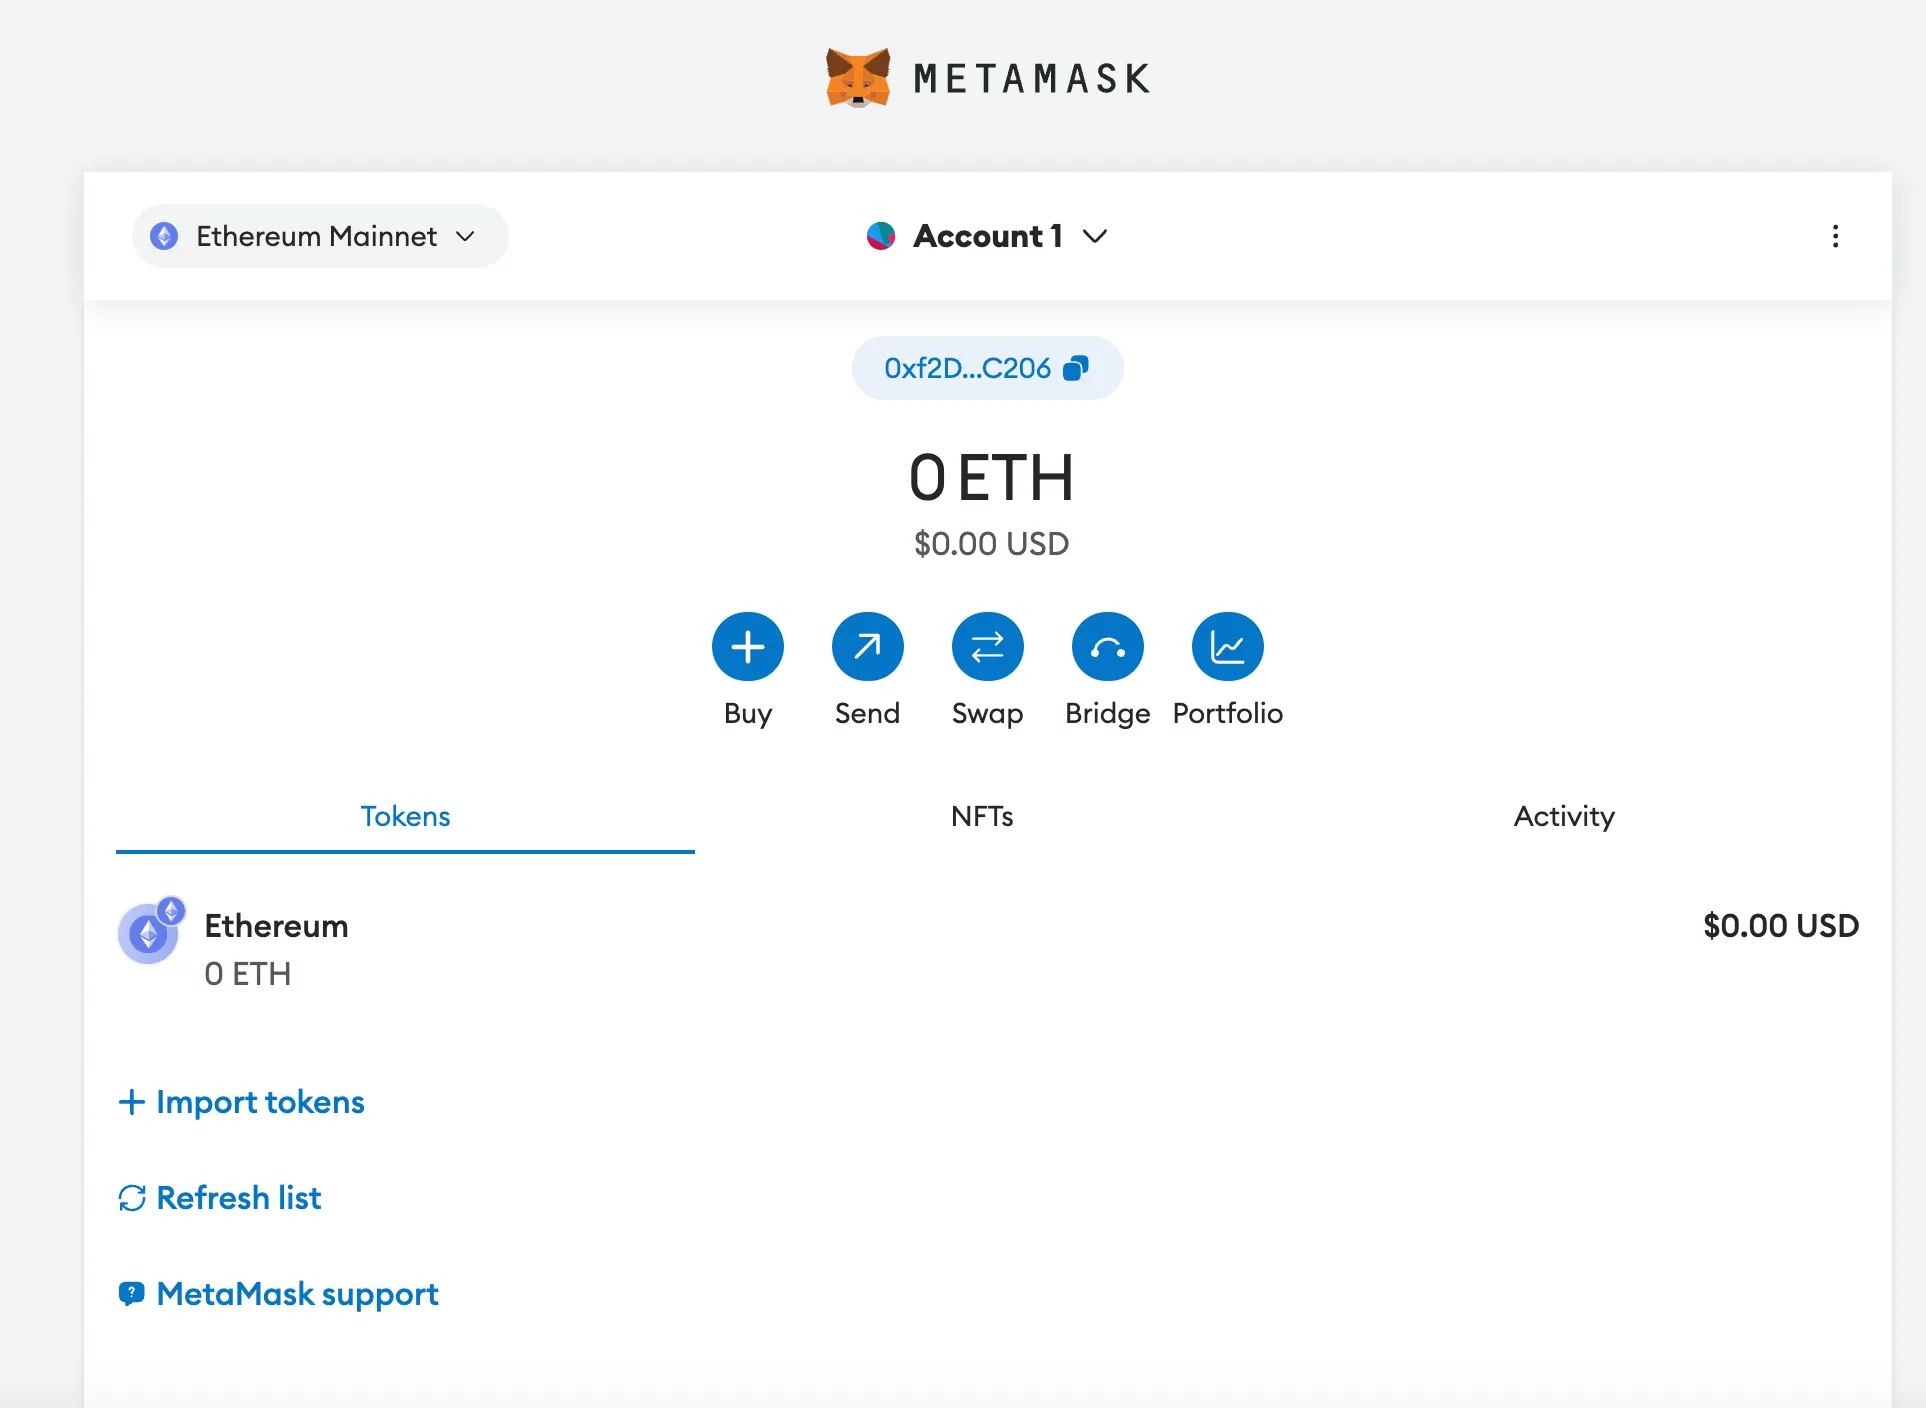
You can now access your list of assets in the ‘Tokens’ tab and view your transaction history in the ‘Activity’ tab. We’ll dive into many of the features and icons you see here in the coming chapters.
MetaMask is a convenient tool to interact with decentralized applications, also know as dApps, and to onboard into the vast world of web3. To use MetaMask to interact with a dApp or smart contract, you’ll usually need to find a ‘Connect to Wallet’ button or similar element on the platform you are trying to use. After clicking this, you should then see a prompt asking whether you want to let the dApp connect to your wallet.
The below example shows how you connect MetaMask to decentralized exchange Uniswap, but a similar process should be observed for other dApps. Simply connecting with a dApp means it can view your addresses — it cannot access your funds.
Once connected, you'll then be able to interact with the dApp and use its features.
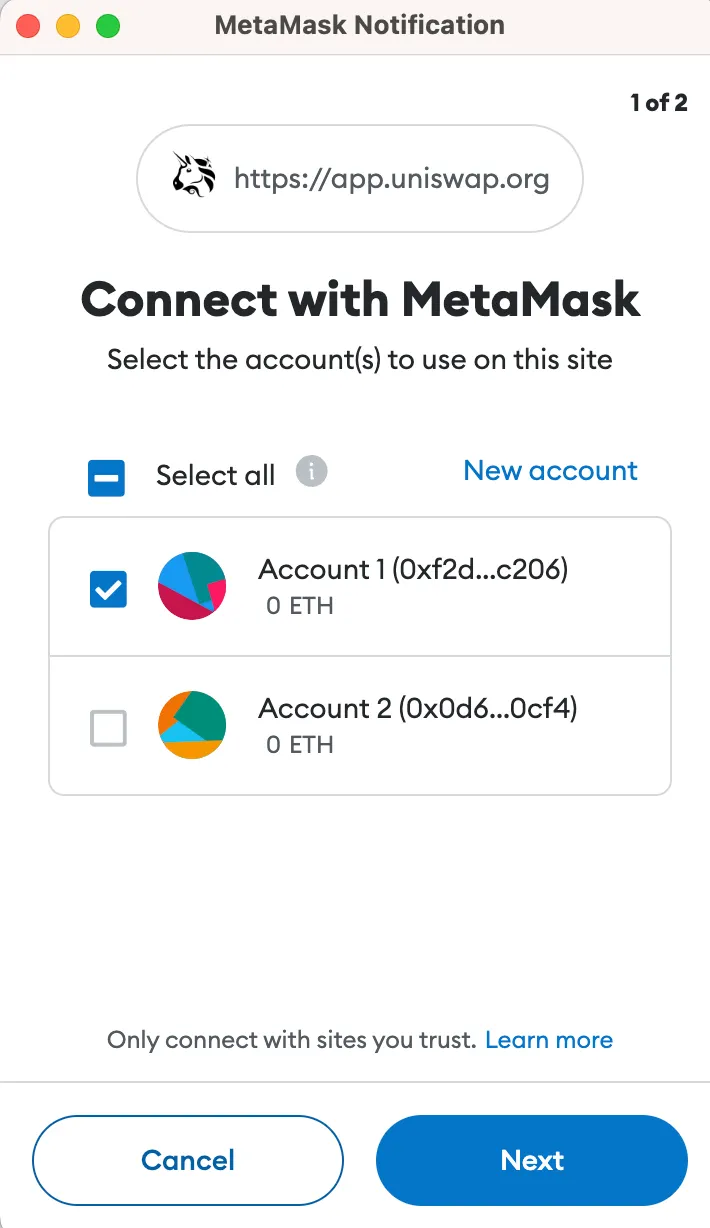
These dApps automatically connect to MetaMask, simplifying the connection process. Within the dApp, if any transaction or permission is required, a pop-up window will appear asking to confirm the transaction from the MetaMask account.
What Advantages Does MetaMask Have?
- 😻 Popular - It is commonly used, so users only need one plugin to access a wide range of dApps.
- 🕐 Simple - Instead of managing private keys, users just need to remember a list of words, and transactions are signed on their behalf.
- 💽 Saves space - Users don’t have to download the Ethereum blockchain, as MetaMask sends requests to nodes outside of the user’s computer.
- 🔗 Integrated - Designed to work with MetaMask, these dApps become much easier to use.
- Features: It comes with a variety of powerful and easy-to-use features.
Cheat Sheet
- By connecting via MetaMask to Ethereum-based dApps, users can spend their coins in games, stake tokens, and trade them on decentralized exchanges.
- MetaMask is one of the simpler Ethereum wallets and dApp browsers to use.

